
There are so many lovely plant containers and pots available for use in our gardens, on decks and porches, and indoors. How do you choose the best one? Too often we are guided by our taste alone. However, to keep your container gardens growing happy and healthy you should give some consideration to the plant's needs when choosing a planter. Some things are common sense, like ensuring your planter has drainage holes.
Here are some other things to think about:
Plant Selection
We often leave the choice of plants to the very end of creating a container garden. It's not crucial that you know ahead of time exactly what plant you plan to use in your container garden, but you do need to consider a couple of key facts when deciding on a planter.
- Can the plant survive in dry conditions?
- What is the mature size of the plant you've chosen? Be sure you've chosen a pot that is big enough for the plant's root ball as it grows.
Exposure
Will the container be exposed to the hot mid-day sun? Will it be in full sun all day? How about strong breezes? We've already mentioned that all pots dry out faster than soil in the garden, but certain exposures will exacerbate the situation. If you are planting in full sun, you will probably want a pot made from the material that is not porous. Terracotta dries out very quickly. Synthetic resin pots stay cooler and retain moisture longer.Watering
Is someone able to water every day? If not, does the pot or container have a drip tray or a reservoir so that it can be filled from the bottom and soak up water as needed? Once a plant has been stressed from lack of water, it may never recover.Winter
Will you be leaving the planter out through the winter? In USDA Zones 7 and above, this usually won't make a difference. Colder climates will need to choose frost safe containers like stone, cement, and wood. Even then, most containers need some extra protection in winter.Mobility
Do you need to move the pot around? Sometimes a planter on a deck needs to be moved for convenience. Maybe you want the ability to move your container garden where the sun or shade is or you plan on taking the container in for the winter. If you need the ability to move the pot for any reason, think twice about buying either a heavy or cumbersomely large planter. Concrete urns are gorgeous, but they should stay where you put them so as not to break either your back or the urn.Materials - Clay & Stone
Terracotta: Traditional, but porous and dries out quickly. Many are not frost-resistant. If it was made in a warm area, like the Mediterranean, it's probably not.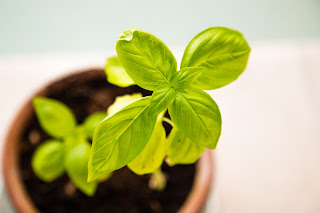 Stone and Concrete: Both are good for maintaining soil temperature and moisture. They heat up but also insulate. Both can be left out over winter, but not great choices if the planter needs to be moved. Great if you need a planter the dogs can't knock over. Hypertufa is also an option.
- Using Pots as Indoor Decorations
Materials - Wood & Metal
 Wood: Good water retention. Hardwoods are better against rot, but all wood planters can be treated with preservatives. Look for good construction and joints, since wood will shrink and expand with moisture. OK for winter. Don't let them sit directly on the ground.Metals: Generally heavy, so they are excellent for stabilizing tall plantings. They don't just dry out, they heat up and need frequent watering or the roots could bake. Often a good choice for winter containers.
Materials - Synthetic
Fiberglass and resin: Synthetic pots have come a long way. Many can easily fool the eye into thinking they are a natural material, especially as they age. They are light, durable, inexpensive and often frost-resistant.Plastic: Lightweight and moisture conserving. The semi-flexible pots work best for cold winters and are also good as liners. Plant directly into the plastic pot and then slip the plastic pot into the more decorative container. You get the benefits of both.


Komentāri
Ierakstīt komentāru